Table of Contents Show
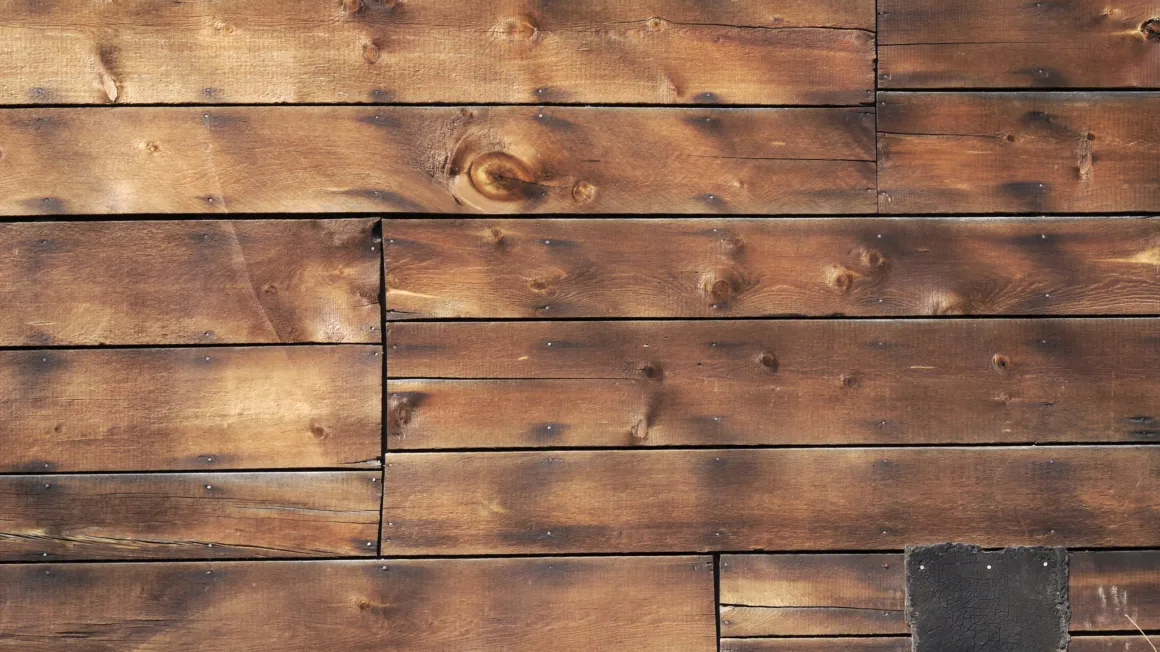
Guide to Cleaning Cedar Siding
Over time, cedar siding grows dull and stained from weather, dirt, mildew, pollen, and other airborne items. Before you break out a can of stain, you may be able to bring the luster back by cleaning the cedar siding.
Let’s learn the proper method.
Perform a Quick Inspection
Walk the perimeter of your home and inspect the siding for trouble areas, such as areas with mildew growth. Those areas may require multiple cleaning applications to completely remove the mildew, so you may want to begin cleaning in the more difficult areas.
Also, check windows and doors to ensure caulking is in place and will not allow water or cleaner to enter your home. Replace any loose or cracked caulking and allow at least one day for the caulk to dry before cleaning the cedar siding.
The Cleaning Process
The key to properly cleaning cedar siding is using the right tools for the job. The best cleaner for removing grime and mildew is oxygen bleach. Oxygen bleach will not damage the color or wood fiber of the siding like regular household bleach can and is not toxic to landscaping.
Mix the oxygen bleach according to the manufacturer’s instructions in a large plastic bucket or mix the solution in a spray canister for easier application. Apply the cleaner to the siding using the spray canister or with a sponge. You can use a sponge mop to easily reach high places.
Allow the cleaner to sit for approximately fifteen minutes. If the temperature is high or the sun shines directly on the area you’re cleaning, reapply the cleaner when it begins to dry out. It may be easier to work with one smaller section at a time depending on the weather.
After fifteen minutes, scrub the siding with a medium-bristled, plastic scrub brush to remove all dirt, grime, and mildew. Do not scrub the siding with steel wool or other harsh cleaning tools as you may damage the siding.
If an area with heavy mildew concentration does not come completely clean after the first cleaning, repeat the cleaner application and waiting process as many times as necessary to completely remove the mildew.
Read Also:
The Rinsing Process
When you’ve finished scrubbing loose all the grime and mildew from the siding, rinse the siding thoroughly using a regular garden hose. Do not use a pressure washer to rinse the siding as the force of the water stream can cause water to seep between the siding and into the framework of your home.
Always attempt to rinse the siding with a perpendicular stream of water, even if you must use a ladder to create the right angle. Spraying the water upward at the siding may result in seepage between the siding and the home’s framework.
When you’re done rinsing the siding, spray down nearby plants and bushes to rinse and cleaner the leaves, flowers, and limbs. Although oxygen bleach is not toxic to plants, it is always best to rinse the cleaner from a surface rather than allowing it to dry there.
References and Photo Credit
- Ask the Building: Natural Wood Siding Needs TLC
- Purdue University: Selection and Application of Exterior Finishes for Wood
- Photo by Chad Kainz, https://www.flickr.com/photos/smaedli/3377494904/