Table of Contents Show
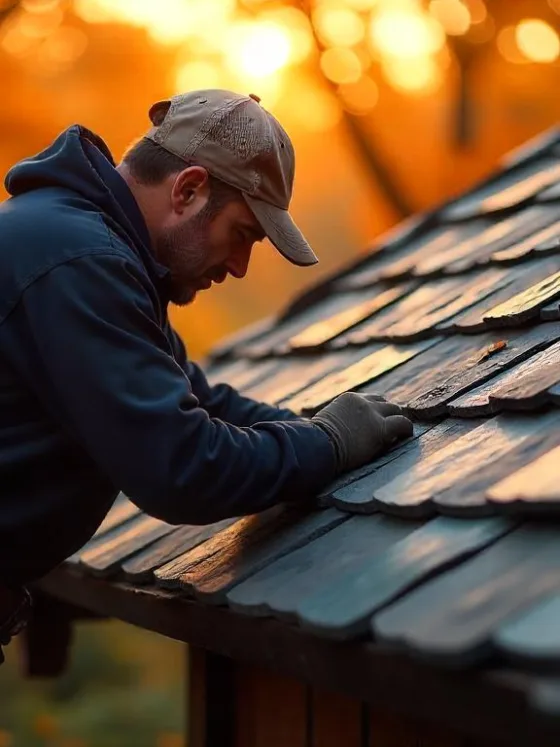
Do you find yourself in a unique situation while installing oak flooring? Whether it’s an imposing fireplace, floor vents, door jambs, or an uneven wall, we’ve got your back. This guide will walk you through the process of installing oak flooring in these special scenarios.
A Quick Introduction
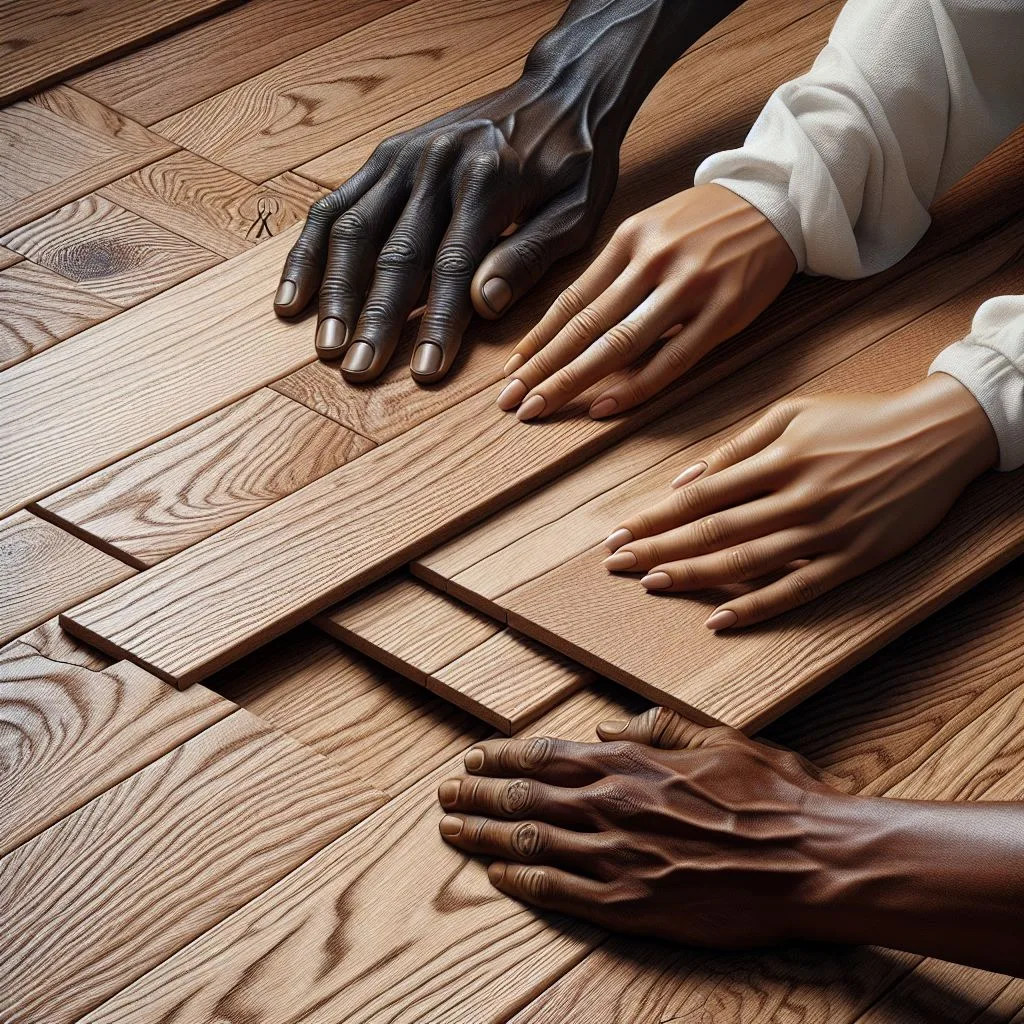
Installing oak hardwood strip flooring is generally a simple job. But when it comes to rooms with peculiar features like pipes, floor vents, fireplaces, or doorframes and moldings that require intricate cuts, things can get tricky. So let’s delve into how to handle these special situations during your oak flooring installation.
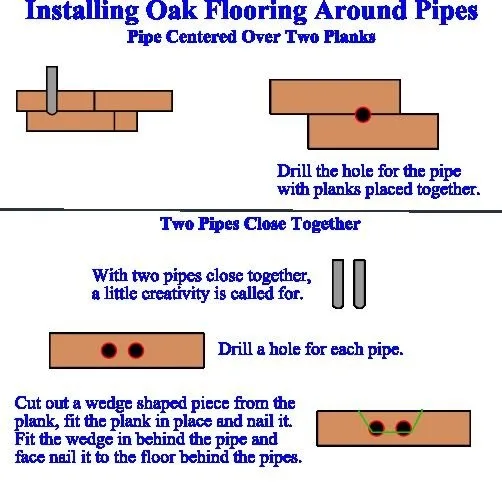
Dealing with Vertical Pipes
When installing oak flooring, obstacles like vertical pipes can add a layer of complexity to the process. However, with the right approach and tools, you can seamlessly incorporate these elements into your flooring layout. Depending on how your flooring strip intersects with the pipe, there are two primary methods to consider: using a drill or a hole saw.
1. Dealing with a Pipe Overlapping the Edge of a Piece
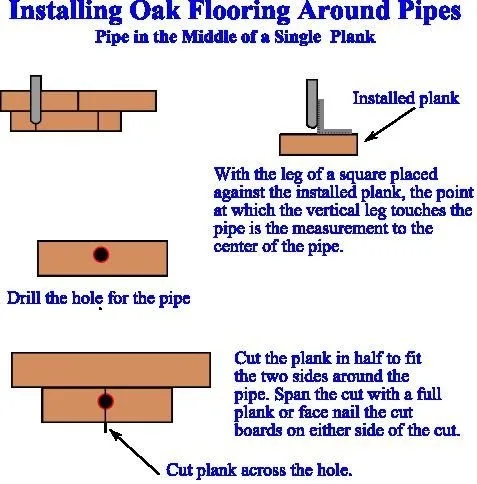
In cases where a pipe overlaps the edge of a piece of flooring, it’s important to work gradually toward the pipe. This will allow both pieces to be fitted simultaneously.
Here are the steps:
- Marking: Begin by marking the positions for the holes on both pieces of flooring that will surround the pipe.
- Drilling: Next, use your drill to create a hole that spans across both marked pieces. It’s essential to make sure that this hole is about 1/2-inch larger than the outside diameter of your pipe – this gives room for expansion and movement over time.
Also Read: Discover the Beauty and Versatility of Common Hardwood Flooring Types
2. Dealing with a Pipe Falling Entirely Within a Strip
In scenarios where your pipe falls entirely within one strip of flooring, you’ll need to modify your approach slightly.
Follow these steps:
- Marking: Start by marking the precise location of the hole on your flooring strip.
- Drilling: Drill out this marked hole.
- Cutting: Once your hole is drilled, cut your strip in half.
- Fitting: Now fit these two pieces around the pipe.
- Securing: Secure them in place using nails as you would during normal installation.
- Finishing touches: To maintain uniformity across your floor, add two nails at each end through the face of your boards and fill them with color-matched putty.
- By carefully following these guidelines, you can ensure that vertical pipes don’t obstruct your oak flooring installation process. Remember, the key to a perfect installation lies in patience and precision.
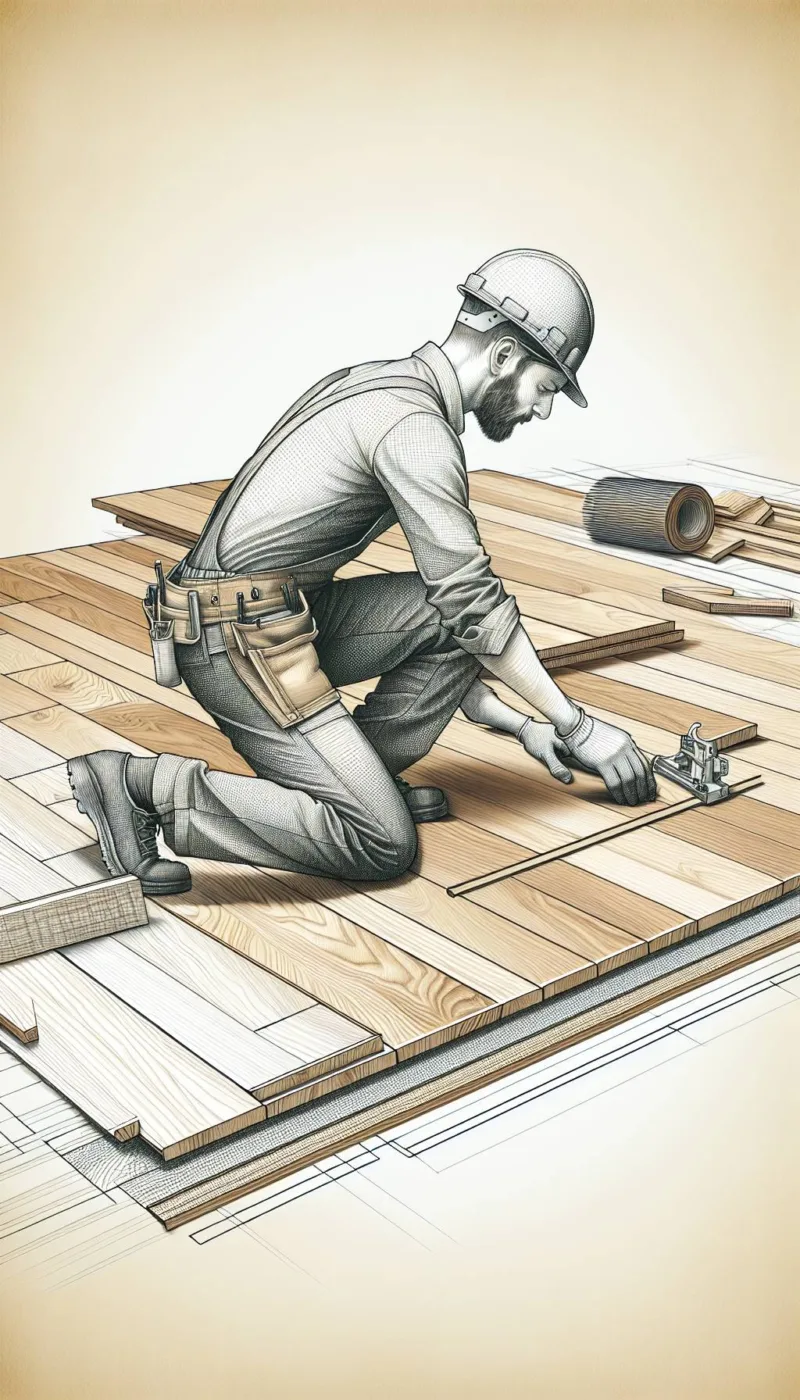
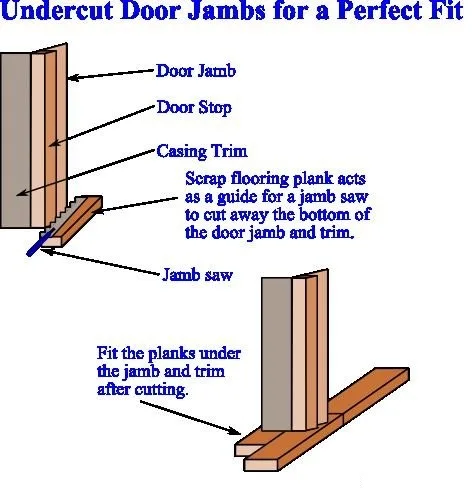
Fitting oak flooring around door jambs, stops, and casings can initially appear to be a complex task. However, with the right tools and techniques, it is perfectly manageable. This process can be broken down into clear, straightforward steps that help to demystify the complexity.
Step-by-Step Guide to Fitting Flooring Around Doorways
1. Preparation: Start by using a piece of scrap flooring as a guide for your jamb saw. This simple trick can greatly ease the process and improve accuracy.
Interesting Fact: A jamb saw is specifically designed to make flush cuts into tight corners and underneath toe spaces.
2. Making the Cuts: With your guide in place, make flush cuts into the door jamb and casing. This effectively raises it off the floor. The purpose of this step is to create enough space for your oak flooring to fit snugly underneath.
Blockquote: “Precision is key at this stage. Accurate cuts ensure a seamless fit between your oak flooring and the door jamb.”
3. Fitting the Flooring: Once you’ve made accurate cuts, you can begin to fit your flooring under the jamb and casing. This should be a relatively smooth process if the previous steps have been carried out correctly.
Industry Tip: For those unfamiliar, ‘casing’ refers to the finished trim or frame around a door or window.
4. Final Adjustments: Lastly, don’t forget to maintain about a 1/4 inch gap between the strips of flooring and house framing for expansion purposes.
Remember, working with oak flooring around doorways need not be daunting if tackled methodically. With patience, precision, and attention to detail, you’ll navigate this challenge like a pro.
Also Read: DIY or Hire a Pro: The Great Hardwood Flooring Install Debate
Working Around Stone Fireplaces
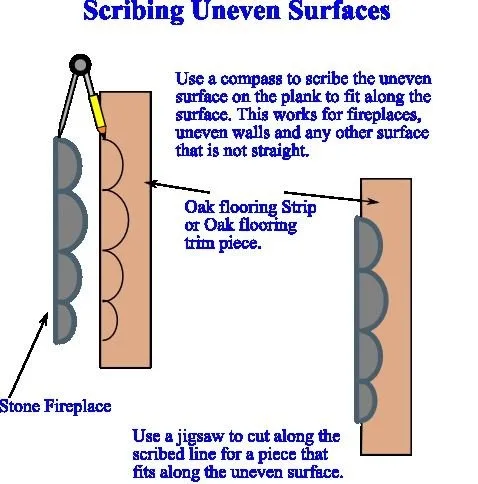
Working with oak flooring around stone fireplaces or walls can seem daunting, but with the right strategy and attention to detail, it’s a challenge you can confidently overcome. Here’s a detailed step-by-step guide on how to navigate this installation process:
- Maintain an Expansion Gap: Always remember to maintain about a 1/4-inch expansion gap between the flooring and the fireplace. This allows the wood to expand and contract naturally without causing any damage or warping.
- Plan Your Layout: You will likely have planks meeting the fireplace from both the sides and front. This means that some planks will be laid parallel to the fireplace while others will approach it perpendicularly. Strategize your layout before you start cutting and placing your planks.
Laying Parallel Planks
For planks that run parallel to your fireplace, follow these steps:
- Lay Out Your Planks: Continue laying these planks until you reach a point where the last plank won’t fit against the stones of your fireplace.
- Trace The Outline: Use a compass to accurately trace the outline of the stones onto your plank. This ensures that your cuts will align perfectly with the irregular shape of your fireplace stones.
- Cut Along The Outline: After tracing, cut along these lines using a jigsaw. Be sure to follow your traced lines closely for a snug fit.
Pro Tip: For optimal results, use a fine-toothed blade in your jigsaw when cutting oak flooring.
Approaching the Fireplace Perpendicularly
When laying planks that approach the fireplace perpendicularly:
- Avoid Short Planks: Don’t resort to using all short planks near the fireplace as this can result in an unprofessional look. Instead, continue to use random lengths as you would in any other part of your installation.
- Trace and Cut: Just as with parallel planks, trace the stone outline onto each plank and cut accordingly.
Covering the Expansion Gap
After laying all your planks:
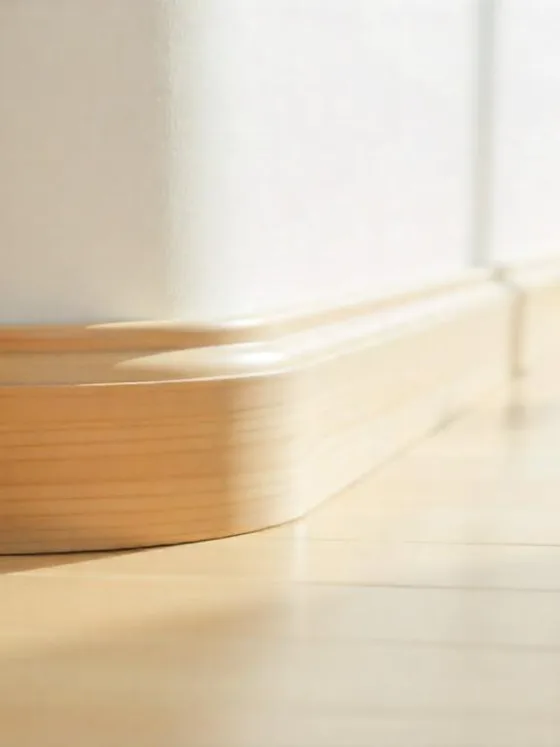
- Cut a Custom Molding: To cover the expansion gap, cut a custom piece of molding that fits the space without leaving any additional gap.
- Fine-Tune Your Cut: Use sandpaper and small wood files to fine-tune this cut until it fits perfectly against both your flooring and the fireplace.
- Secure The Molding: Nail this molding into place, ensuring you’re attaching it to the subfloor rather than the oak flooring that it covers.
By following these steps meticulously, you can achieve a professional-looking installation around any stone fireplace or wall. Remember, patience is key when working with materials like oak and stone, but with careful planning and execution, you’ll be able to showcase your craftsmanship with pride.
Also read: How to Keep Your Hardwood Floors Looking Fabulous
Managing Floor Vents
When installing oak flooring, you might come across floor vents that can disrupt the uniformity of your flooring. An efficient way to handle this is by purchasing flush-mount wooden floor vents that harmonize with your oak planks.
Types of Matching Floor Vents
These matching vents usually come in two separate pieces:
- The Frame: This is the external part of the vent that lies flush with your flooring. It features grooves on all four sides, designed to fit into the tongues of your adjacent planks seamlessly.
- The Vent: It’s the internal part that allows air circulation from beneath the floor.
Installation Steps
When installing these, follow these steps for an immaculate finish:
- Align The Frame: Try aligning at least three sides of your frame with tongue and groove planks. This will ensure a tight fit and will make your vent appear as an integral part of your flooring.
- Use Splines If Necessary: If you find any difficulty connecting the frame’s grooves to those on the planks, don’t fret! You can use splines – thin strips of wood – for this purpose.
- Face-Nail As Required: If you’re unable to manage perfect alignment due to the irregular shape or size of the vent, simply face-nail those planks as required.
Remember, achieving a professional-looking floor installation around elements like floor vents requires patience and precision. But with careful planning and execution, your oak flooring will not only look stunning but also function optimally.

Also Read: Battle of the Hardwoods: Maple vs Hickory
Conclusion
By following these installation steps, you can seamlessly incorporate floor vents into your hardwood flooring. This attention to detail will not only enhance the aesthetic appeal of your space but also ensure efficient air circulation beneath the floor. So take your time, measure accurately, and enjoy the satisfaction of a flawless installation that complements your beautiful hardwood floors.
Read this also: Eco-Friendly Flooring: Top Sustainable Choices
FAQs (Frequently Asked Questions)
What should I do if a pipe overlaps the edge of a piece of oak flooring?
In cases where a pipe overlaps the edge of a piece of flooring, you can carefully measure and mark the area that needs to be notched out to accommodate the pipe. Then, use a jigsaw to carefully cut along the marked lines before fitting the piece around the pipe.
How should I handle a pipe that falls entirely within one strip of oak flooring?
If your pipe falls entirely within one strip of oak flooring, you can use a hole saw to create a hole in the wood that matches the size and shape of the pipe. This will allow the strip to fit seamlessly around the pipe while still maintaining its structural integrity.
What is the best approach for fitting oak flooring around door jambs, stops, and casings?
When fitting oak flooring around door jambs, stops, and casings, it’s best to use an undercut saw to carefully trim the bottom of these obstacles. This will create enough space for the flooring to slide underneath, ensuring a clean and professional finish.
How should I work with oak flooring around stone fireplaces or walls?
When working with oak flooring around stone fireplaces or walls, it’s important to carefully measure and cut each piece to fit precisely against the irregular edges of the stone. Additionally, using a high-quality construction adhesive can help secure the flooring in place.
What steps should I follow when laying parallel planks near my fireplace?
When laying parallel planks near your fireplace, it’s crucial to start by measuring and marking guidelines for accurate placement. Additionally, using spacers between each plank can help maintain consistent spacing and ensure a professional-looking result.
How should I approach laying planks that approach the fireplace perpendicularly?
When laying planks that approach the fireplace perpendicularly, it’s important to start by carefully measuring and cutting each piece at precise angles. This will ensure a seamless fit against the edges of the fireplace while maintaining a professional appearance.