Table of Contents Show
Embarking on home renovations can stir up visions of hefty bills and drained bank accounts. But here’s some good news: revamping your space doesn’t have to be a wallet-emptying endeavor. Budget-friendly home renovation ideas are all about making smart, impactful changes without the steep price tag. These can range from simple paint jobs and lighting enhancements to creative recycling of your own furniture pieces.
In the spirit of keeping your finances in check while still achieving that ‘wow’ factor, this article is packed with 15 home renovation ideas that are as affordable as they are impressive. Whether you’re looking to add a splash of color, infuse some technology, or maximize your existing space, these suggestions will guide you through cost-effective ways to breathe new life into your home. Let’s dive into these amazing and affordable ideas that promise to inspire your next home project and transform your living space without breaking the bank.
1. Paint and Lighting Upgrades
Paint: More Than Just a Color
A fresh coat of paint can instantly transform any room in your house. It’s more than just a color — it’s an ambiance setter, a mood booster, and a space definer.
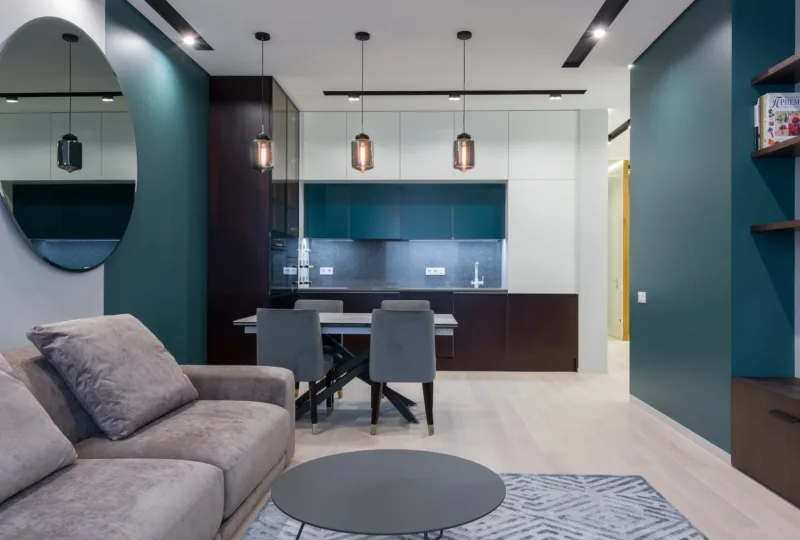
- Experiment with bold colors like vibrant turquoise or deep burgundy to bring life to a dull living room.
- Use neutral shades like beige or gray for a serene and inviting atmosphere.
Remember, the color you choose should complement your furniture and décor, not clash with them. For useful tips on selecting the perfect shade for your rooms, consider this guide on how to make your home cozy and comfortable for winter from interior designers.
Strategic Lighting: The Game Changer
Equally important to paint is strategic lighting. It can enhance the atmosphere of any room and highlight its best features.
- Use layered lighting techniques:
- Ambient light for overall illumination
- Task lighting for specific activities like reading or cooking
- Accent lighting to draw attention to artwork or architectural elements
Remember to choose fixtures that match your home’s style — rustic chandeliers for country homes or sleek pendant lights for modern spaces.
Energy-Efficient Lighting: Double Win
Investing in energy-efficient lighting is not only good for the environment but also for your electricity bill. Opt for LED lights over traditional incandescent ones.
- They may be slightly more expensive initially but they last longer and consume less energy.
- Plus, their quality of light is superior too.
Home renovation doesn’t always mean tearing down walls or installing new appliances. Sometimes it’s as simple as changing the paint color or upgrading your lighting. So don this hat of a designer and start transforming your spaces one room at a time!
2. Greenery and Refurbishment
Let’s explore how adding greenery and refurbishing can be cost-effective ways to renovate your home.
Bring the Outdoors In with Greenery
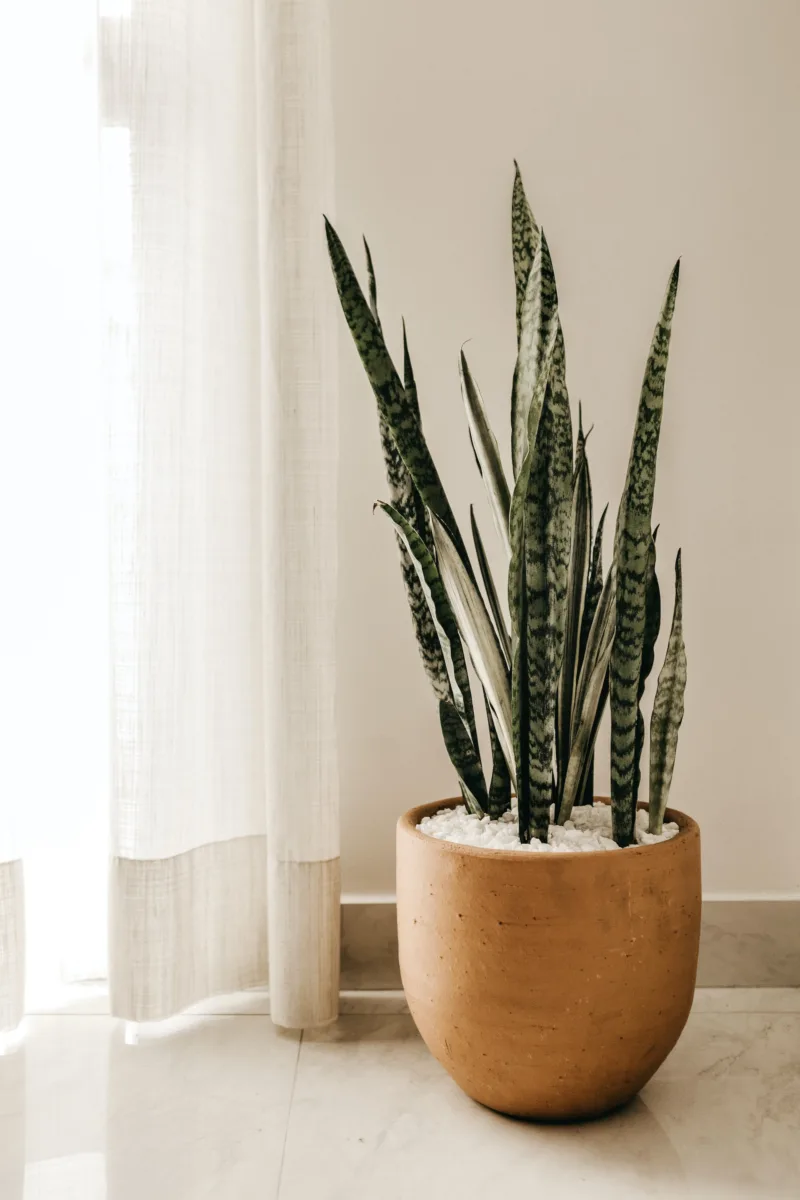
Introducing plants into your home decor not only adds beauty but also improves air quality, creating a healthier environment[^1^]. If you’re new to indoor gardening, here are some easy-to-care-for plant options:
- Snake plants
- Pothos
- ZZ plants
These resilient greens thrive in low-light conditions and require minimal watering, making them perfect for beginners.
Revive Old Furniture through Refurbishment
Instead of buying new furniture, why not breathe new life into your existing pieces? Refurbishing old furniture is a smart and sustainable approach to home renovation on a budget. Here are some ideas to get you started:
- Painting: Transform an old wooden chair with a fresh coat of paint in a vibrant color that matches your style.
- Reupholstering: Give a worn-out sofa or chair a makeover by replacing the fabric with a trendy pattern or texture.
- Sanding and Staining: Revitalize a tired coffee table by sanding away scratches and applying a new stain to enhance its natural beauty.
By refurbishing furniture, not only do you save money, but you also have the opportunity to create unique pieces that reflect your personality.
“Refurbishing furniture does not only give you a sense of accomplishment but also allows you to create unique pieces that reflect your personal style.”
You can find more creative ideas for organizing your home here.
Incorporating greenery and refurbishing furniture are excellent ways to refresh your living space without breaking the bank. They show that with a little imagination and some elbow grease, you can transform your home into a place that feels brand new.
[^1^]: NASA Clean Air Study: Interior Landscape Plants for Indoor Air Pollution Abatement.3. Creating Visual Interest with Gallery Walls, Cabinet Hardware, and Backsplashes
3.1. Gallery Walls
Turning a blank wall into a stunning gallery wall can dramatically enhance the visual interest of any room. Here’s a step-by-step guide to help you create your own:
- Selection: Start by choosing artwork that resonates with you. This could be anything from family photos, prints, paintings, or even fabrics. The key is to select pieces that reflect your style and tell a story.
- Planning: Before hammering any nails into the wall, lay out your chosen pieces on the floor to decide their arrangement. Try different layouts until you find one that feels balanced and visually appealing.
- Framing: Frames can add another layer of interest to your gallery wall. Mix and match different styles, sizes, and colors for an eclectic feel, or stick to identical frames for a modern, cohesive look.
- Hanging: Start hanging the pieces from the center and work your way outwards ensuring each piece is level as you go along.
- Adjusting: Don’t be afraid to move things around until it feels right. Your gallery wall should evolve with you!
Remember, there are no set rules when it comes to creating a gallery wall so let your creativity flow! If you’re looking for some inspiration on how to incorporate Scandinavian design elements into your gallery wall or living room, consider transforming it into a cozy and inviting space with Scandinavian design.
Tip: Use paper cut-outs of your frames to visualize your layout on the wall before making it permanent.
Next up, let’s jump into how cabinet hardware changes can make a big difference in your home renovation project.
3.2. Cabinet Hardware Upgrades
Cabinets and drawers are often overlooked but they actually have a big impact on the look of your kitchen or bathroom. You’d be surprised how much difference a simple change in cabinet hardware can make, it can really freshen up your rooms.
Choosing the Right Hardware
There are so many options when it comes to selecting hardware for your cabinets. Here are some tips to help you make the right choice:
- Understand your space – Look at your room and think about the style you want to achieve. If you have a rustic theme, weathered finishes might be a good fit. For more modern spaces, consider polished chrome or nickel.
- Consider the style and finish of your cabinets – Your hardware should complement these aspects. If you have dark cabinets, lighter-toned hardware could provide a nice contrast.
- Balance functionality with aesthetics – Remember that your hardware not only needs to look nice, but it also has to be easy to use on a daily basis.
Installing New Cabinet Hardware
Once you’ve chosen the perfect hardware for your cabinets, it’s time to install them! Don’t worry, it’s actually quite easy and you won’t need many tools. Just follow these steps:
- Start by removing the existing hardware using a screwdriver.
- Measure and mark the exact spots where the new hardware will be fixed.
- Drill holes carefully on the marked spots.
- Screw the new hardware into place securely but without overtightening.
Make sure you have all the screws and tools you need before you start this project!
With these simple steps, you’ll be able to give your cabinets and drawers a whole new look through cabinet hardware upgrades, without having to spend too much time or money.
Next up: let’s talk about another great way to improve the look of your kitchen or bathroom – installing a backsplash!
3.3. Backsplash Installations
A backsplash can serve as a stunning focal point in your kitchen or bathroom, marrying functionality with style. When choosing the perfect tile or material for your backsplash, consider both aesthetics and practicality. Ceramic and porcelain tiles are popular choices due to their durability and extensive range of colors, patterns, and sizes. For an eco-friendly alternative, consider using recycled glass tiles that add a pop of color and unique texture.
If you’re up for a DIY challenge, there are several user-friendly options to choose from:
- Peel-and-Stick Tiles: These adhesive-backed tiles are simple to install and come in various designs mimicking traditional ceramic or stone tiles.
- Beadboard: An affordable option that adds a charming country feel to your kitchen.
- Stainless Steel Sheets: For a sleek, modern look that’s also easy to clean.
Regardless of the material you choose, proper installation is key to the durability and lifespan of your backsplash. Here’s how you can install it yourself:
- Measure the area to determine how much material you’ll need; it’s always wise to buy slightly more than the calculated amount to account for errors or breakages.
- Ensure the wall surface is clean and dry before starting the installation process.
- Carefully apply the adhesive or mortar according to the manufacturer’s instructions.
- Place each tile firmly in position, using spacers if needed for uniform spacing.
- Once all the tiles are in place, allow them to set and dry completely before grouting.
- Apply the grout using a rubber float, working it into the gaps between the tiles at a diagonal angle.
- Wipe off any excess grout with a damp sponge before it dries.
- After the grout has cured according to the manufacturer’s instructions, seal it with a grout sealer to prevent stains and water damage.
Remember, patience is critical during installation – rushing could lead to mistakes that detract from the final look of your kitchen or bathroom. After all, a well-installed backsplash can significantly enhance your home’s value and appeal.
With these tips in mind, adding visual interest through elements like a backsplash becomes an easy and cost-effective component of your budget-friendly home renovation project.
4. Enhancing the Front Door and Making a DIY Headboard
The way your front door looks can make a big difference in how people perceive your home. It’s like the first impression someone gets when they meet you – it sets the tone for what’s to come. So why not make your front door stand out?
Improving Your Front Door
Here are some ideas to enhance your front door and give it a fresh new look:
- Give it a fresh coat of paint: Don’t be afraid to go bold with colors like cobalt blue or deep burgundy. A vibrant front door can make a statement and make your home unique.
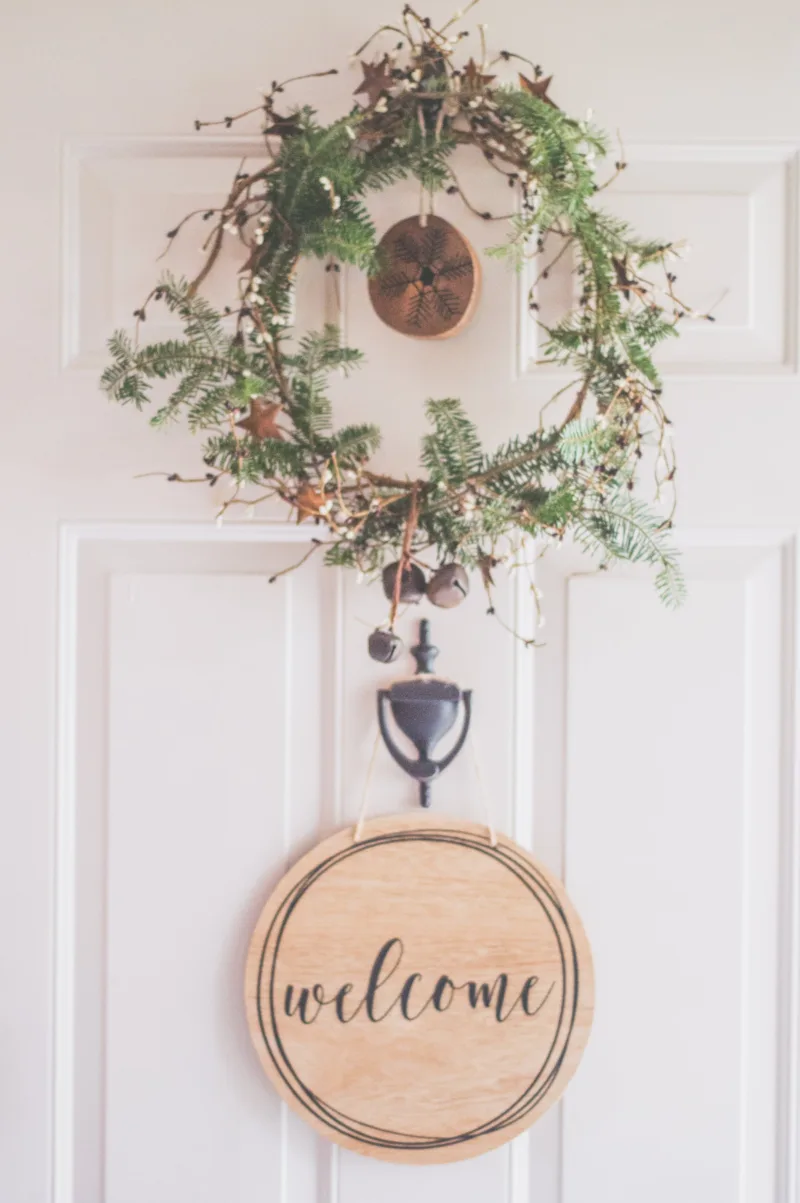
- Upgrade the hardware: If you don’t want to paint, consider replacing your old doorknob with a stylish handle or adding a modern knocker. These small changes can make a big difference.
- Add decor accents: Simple touches like seasonal wreaths or house numbers can add personality to your front entrance without costing a fortune.
Creating a Headboard
Now let’s move inside the house and focus on one of the most important rooms – the bedroom. Specifically, let’s talk about headboards.
A headboard is not only functional (it provides support for your pillows), but it can also be a statement piece that adds style to your bedroom. Instead of buying an expensive headboard from the store, why not make your own? It’s easier than you think!
Here are some DIY headboard ideas that are budget-friendly:
- Repurpose old doors or window frames: If you love vintage aesthetics, this is perfect for you. Find an old door or window frame and turn it into a unique headboard.
- Upholster a large piece of plywood: For a more modern look, get a big piece of plywood and cover it with fabric in your favorite print or color. Voila! You have a custom headboard.
- Add shelves for storage: If you’re short on space, consider building shelves into your headboard. This way, you’ll have extra storage and display space.
Remember: The key to successful DIY projects is to let your creativity shine. Whether you’re updating your front door or making a headboard, these projects can completely transform your spaces without costing a fortune.
5. Embracing Smart Home Technology: The Case for Smart Thermostats
In the realm of budget-friendly home renovations, one might not immediately consider the benefits of smart home technology. However, integrating a smart thermostat into your HVAC system can be a game-changer. These tech-savvy devices offer a host of benefits that enhance your living experience and can even contribute to significant cost savings in the long run.
Smart thermostats allow you to regulate your home’s temperature with precision, providing maximum comfort and efficiency. Instead of a traditional thermostat that has to be manually adjusted, these devices can automatically adapt based on your daily routines and preferences.
Energy-saving Features
One of the standout features of smart thermostats is their energy-saving capabilities. They do this by:
- Learning: Smart thermostats learn from your behaviors and adjust themselves accordingly. For example, if you turn down the heat every night at 9 pm, the thermostat will eventually start doing it for you.
- Adapting: Using sensors and algorithms, smart thermostats can detect when you’re away from home and adjust the temperature settings to save energy.
- Reporting: Many smart thermostats provide energy reports letting you know when and how much energy you’re using.
Cost Savings
While the upfront cost may be higher than a traditional thermostat, the potential savings make it a worthwhile investment. Many households report savings on their annual heating and cooling costs after installing a smart thermostat. Plus, certain models qualify for rebates from utility companies or tax credits.
By incorporating smart technology like this into your home renovation plan, you’re not just upgrading your lifestyle but also making an investment that can pay off in many ways down the line.
6. The Power of Decluttering and Organizing Spaces Before Renovating
Embarking on a home renovation project can be a thrilling journey. Yet, stepping into this adventure with a cluttered space might make the process more challenging than it needs to be. Decluttering and organizing beforehand light the path for an efficient and successful renovation.
When you declutter before renovating, you’re not only clearing physical space but also making room for new design possibilities. Think about it: A room filled with unnecessary items can obscure your vision of what the space could become. Freeing up the area allows you to truly see the potential of your space.
Why Decluttering Matters
Decluttering is an essential step before starting any renovation project because it:
- Helps you visualize design possibilities
- Reduces stress and overwhelm during the renovation process
- Provides a fresh start for your new space
How to Declutter Before Renovating
Here’s how to get started:
- Start Small: Tackling clutter can feel overwhelming. So, start with a small area—perhaps a single drawer or shelf—and work your way up.
- Categorize: Sort items into categories like ‘keep’, ‘donate’, ‘sell’, or ‘discard’. It’ll make the process more manageable and systematic.
- Storage Solutions: Consider investing in storage solutions that’ll keep your spaces tidy during and after renovations. Be it stylish baskets, multifunctional furniture, or built-in shelves—the right storage can even contribute to your overall design aesthetic.
But don’t stop at decluttering. Effective organization is just as crucial during the renovation process itself. Keep tools, materials, and any remaining furniture neatly arranged to ensure a smoother workflow. A clean work environment promotes efficiency and safety during renovation works.
So, before you pick up that hammer or paintbrush for your next home improvement project, such as creating your dream home, take some time to declutter and organize. You’ll be surprised how these simple steps can pave the way for a more enjoyable and less stressful renovation experience.
7. Enhancing Space with Mirrors and Open Shelving Solutions
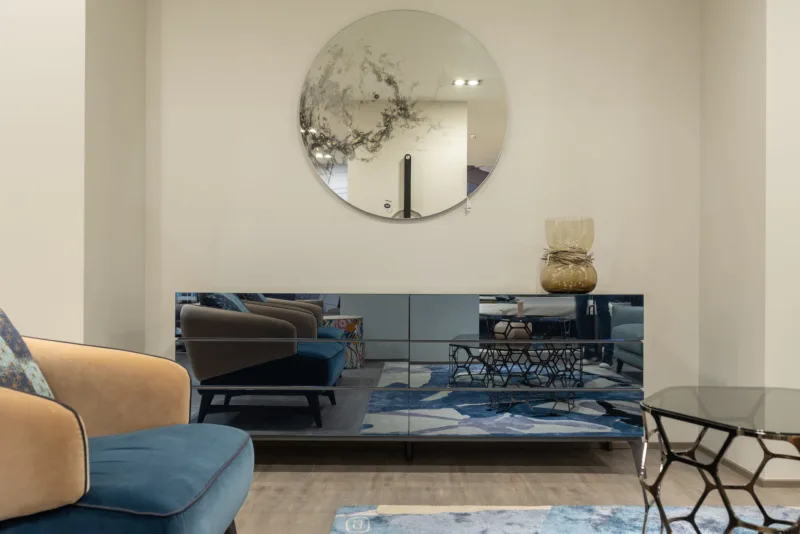
Mirrors are not just for checking your reflection; they’re a renovator’s secret weapon to make any room feel more spacious and brighter. By reflecting light and views, mirrors can transform a cramped area into one that feels airy and open. When selecting a mirror, consider these factors:
- Size: A large mirror can be a statement piece, while smaller ones add accents.
- Shape: Round mirrors soften a space, while angular designs align with a more structured decor style.
- Placement: Position mirrors opposite windows to maximize the influx of natural light.
This trick pairs well with open shelving, which offers both functionality and aesthetic appeal in home renovations.
Open shelves serve as an excellent way to:
- Display cherished mementos, books, or artwork
- Store everyday items in an accessible yet orderly fashion
- Create visual interest through the arrangement of various objects
To integrate open shelving into your home effectively:
- Assess Your Needs: Determine what you want to display or store.
- Select Your Style: Choose materials and designs that complement your interior.
- Install Thoughtfully: Place shelves at various heights to create dynamic visual landscapes.
And while you’re enhancing your interior, don’t let winter’s chill put a damper on your comfort at home. Consider incorporating tips and tricks from interior designers on how to make your home cozy and comfortable for winter. Transform your home into a warm and inviting sanctuary by embracing textures, warm colors, mood lighting, and natural elements that will make you never want to leave.
Combining the illusion of more space granted by mirrors with the chic utility of open shelving can dramatically change the feel of any room without overextending your budget.
8. Extending Living Areas: Creating Cozy Outdoor Spaces on a Budget
Outdoor living spaces have become essential, particularly for homes where indoor square footage is at a premium. The allure of a private outdoor oasis is undeniable – it’s a place to unwind, entertain, and enjoy the beauty of nature without leaving your doorstep. Here’s how you can transform any balcony, patio, or backyard into a cozy outdoor space on a budget:
Comfortable Seating Options
DIY Pallet Couch
Recycle wooden pallets into a chic and comfortable outdoor couch. Cushion it with weather-resistant fabric for a custom look.
Hammocks and Swing Chairs
These are perfect for lounging and add a playful touch to your outdoor area.
Multipurpose Crates
Wooden crates can be painted and cushioned to serve as both seating and storage.
Ambient Lighting
String Lights
Drape these lights around your space to create an inviting glow after dusk.
Solar-Powered Lamps
Economical and eco-friendly, solar lamps store sunlight by day and light up your evenings.
DIY Lanterns
Transform mason jars or tin cans into artistic lanterns with candles or LED lights inside for subtle illumination.
Creating a comfortable atmosphere outdoors enhances the living area of your home, offering an additional venue for relaxation and social gatherings. With these budget-friendly ideas, you’re well on your way to enjoying the fresh air in style.
Conclusion
Renovating your home doesn’t have to be expensive. From incorporating budget-friendly home renovation ideas to adding insulation to an older brick home, you can make significant changes without spending a fortune.
Here are some key takeaways:
- Paint and lighting upgrades can dramatically transform the mood and feel of a room.
- Greenery and refurbishment are excellent ways to add life and character to your space.
- Gallery walls, cabinet hardware upgrades, and backsplash installations offer unique opportunities to elevate your decor.
- Enhancing your home’s exterior with a revamped front door or creating a DIY headboard can improve both functionality and aesthetics.
- Incorporating smart home technology like energy-efficient smart thermostats can also result in long-term savings.
- The power of decluttering can’t be overstated – it not only creates more room but also gives you a fresh perspective on your living space.
- Mirrors and open shelving solutions are ingenious ways to give an illusion of expanded space, especially in smaller homes.
- Don’t overlook the potential of outdoor areas; they can be transformed into cozy retreats for relaxation or entertainment.
Remember, these ideas are just the starting point. Your home is your canvas, so don’t be afraid to experiment. Start small if you must, but start nonetheless. Embrace the process, enjoy every bit of progress, and cherish the transformation that follows. With confidence and creativity, you can create beautiful spaces without breaking the bank.
FAQs (Frequently Asked Questions)
Some budget-friendly home renovation ideas include paint and lighting upgrades, adding greenery and refurbishing, creating visual interest with gallery walls, cabinet hardware, and backsplashes, enhancing the front door, embracing smart home technology, decluttering and organizing spaces, enhancing space with mirrors and open shelving solutions, and extending living areas by creating cozy outdoor spaces on a budget.
A fresh coat of paint instantly transforms any room by giving it a new look. Strategic lighting is equally important as it can enhance the ambiance of a room. Investing in energy-efficient lighting not only improves the environment but also saves money in the long run.
Introducing plants into your home decor adds beauty and brings the outdoors in. Refurbishing old furniture breathes new life into pieces instead of buying new ones.
Gallery walls can dramatically change the look of a blank wall. Upgrading cabinet hardware adds a stylish touch to cabinets and drawers. Installing a backsplash serves as a stunning focal point in the kitchen.
Enhancing the front door can be done by making improvements to its appearance while creating a DIY headboard that adds a personal touch to bedroom decor.
Smart thermostats offer energy-saving features that result in cost savings in the long run compared to traditional thermostats.
Decluttering is essential before renovating as it creates a clean slate for the renovation process to begin. It allows for better organization of spaces and prevents unnecessary items from hindering the renovation work.
Mirrors can create an illusion of more space while open shelving solutions provide functional storage without making a room feel cramped.
Budget-friendly options for creating cozy outdoor spaces include comfortable seating options such as DIY pallet couches, hammocks, swing chairs, multipurpose crates, ambient lighting using string lights, solar-powered lamps, and DIY lanterns.
Citation
- Mase, G. (2019) Revivify Your Home. Archway Publishing.
- Morrison, D. (2015) Home Renovation and Remodeling Ideas. Accessed on: 2 January 2024.
- Brown, L. (2018) Home Renovation Ideas. [Online]. Available at: (Accessed: 2 January 2024).
- Lynn, K. [Karrie Lynn]. (2023, January 11). DIY Small space renovation! OLD HOUSE MAKEOVER | Budget-friendly makeovers 2023 [Video]. YouTube. https://www.youtube.com/watch?v=WYXA9tNJqIM
- Lindi & Russ. (2022, February 12). 10 DIYS UNDER $100! Affordable Home Improvement Ideas! [Video]. YouTube. https://www.youtube.com/watch?v=J3E6L58o394

