Table of Contents Show
Outdoor fireplaces are becoming more popular than ever. According to recent studies, homes with outdoor living spaces, particularly those featuring fireplaces, can see a significant increase in property value. Not only do they enhance outdoor space, but they also create a cozy atmosphere for family and friends to gather around. A DIY outdoor fireplace allows homeowners to add their personal touch while saving money and achieving immense satisfaction from the build.
This article will guide you step-by-step through the process of building your own outdoor fireplace, covering everything from planning and materials to construction and safety considerations.
Planning Your DIY Outdoor Fireplace Project
Choosing the Perfect Location
Selecting the right spot is crucial for your DIY outdoor fireplace. A well-planned location ensures safety, functionality, and optimal enjoyment of your outdoor living space.
Key Factors to Consider
Sun Exposure
- Position your fireplace where it can capture warmth from the sun, especially in cooler months
- South-facing locations are typically ideal for maximum sunlight exposure
- Consider seasonal sun patterns to optimize year-round usage
- Avoid areas that receive excessive shade during peak usage hours
Proximity to the House
- Keep the fireplace 15-20 feet from your home’s structure
- Ensure it’s close enough for convenient access to supplies and seating
- Position away from windows and doors to prevent smoke from entering
- Consider prevailing wind directions in your area
Local Regulations and Codes
- Check municipal building codes for specific setback requirements
- Verify if permits are required for outdoor fireplace construction
- Review homeowners’ association guidelines
- Confirm compliance with local fire safety regulations
Optimal Placement Guidelines
Ideal Locations Include:
- Level, well-drained areas
- Spots with natural wind protection
- Areas with stable ground conditions
- Spaces that complement existing landscaping
- Locations with easy access to fuel storage
Locations to Avoid:
- Under tree canopies or near overhanging branches
- Areas prone to water accumulation
- Spots too close to property lines
- Near utility lines or underground services
- Locations that obstruct important views or pathways
Safety Tip: Before finalizing your location, contact local utility companies to mark underground lines and ensure safe placement of your outdoor fireplace foundation.
Consider creating a comfort zone around your fireplace with a radius of 8-10 feet for seating and circulation. This space should be clear of obstacles and provide enough room for guests to gather comfortably while maintaining a safe distance from the fire.
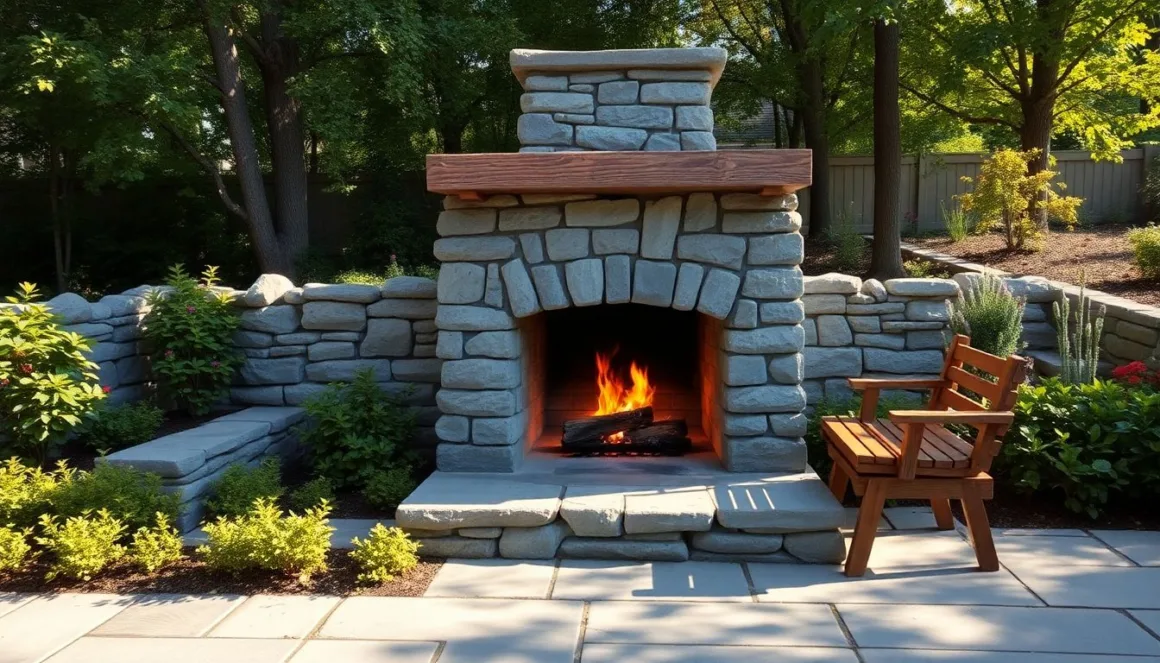
Designing Your Outdoor Fireplace
Before breaking ground on your outdoor fireplace project, careful planning and design considerations are essential for creating a functional and aesthetically pleasing focal point in your backyard space.
Key Design Considerations
Size Specifications
- Width: Typically ranges from 24 to 48 inches for the firebox
- Height: Standard heights range from 6 to 8 feet, including chimney
- Depth: Allow 18-24 inches for proper fuel burning and safety
Remember: Your fireplace should be proportional to your outdoor living space. A general rule is that the fireplace should occupy no more than 15-20% of your patio or deck area.
Style Elements
Choose from these popular design approaches:
- Rustic
- Natural stone facades
- Rough-hewn materials
- Earth-tone color palettes
- Modern
- Clean lines and angles
- Concrete or metal finishes
- Minimalist details
- Traditional
- Classic brick patterns
- Symmetrical design
- Decorative mantels and hearths
Design Resources
To visualize your project:
- Browse architectural magazines
- Visit home improvement websites
- Use design apps and software
- Create a mood board with material samples
- Take photos of fireplaces you admire
Material Compatibility
Consider how your chosen materials will:
- Withstand local weather conditions
- Complement your home’s exterior
- Work with existing landscaping
- Meet local building codes and regulations
Remember to factor in your region’s climate when selecting materials, as some options may be better suited for certain weather conditions than others.
Obtaining Necessary Permits and Approvals
Before breaking ground on your outdoor fireplace project, you’ll need to navigate the essential legal requirements. Most municipalities have specific regulations governing outdoor structures, especially those involving fire.
Required Documentation
You’ll typically need to gather:
- Property surveys showing the proposed fireplace location
- Construction drawings with dimensions and materials
- Site plans indicating distance from structures
- HOA approval letters (if applicable)
Where to Check Requirements
Start your permit process by:
- Visiting your local building department’s website
- Consulting with your city’s zoning office
- Checking fire department regulations
- Reviewing Homeowners’ Association guidelines
Pro Tip: Some areas require additional environmental permits if you’re building in environmentally sensitive zones or protected areas.
Common Code Requirements
Most jurisdictions enforce these basic requirements:
- Minimum distance (setback) from property lines
- Required clearance from existing structures
- Specific height restrictions
- Approved construction materials
- Proper ventilation specifications
Remember that permit fees typically range from $50 to $500, depending on your location and project scope. Processing times can take anywhere from a few days to several weeks, so factor this into your project timeline.
Gathering Materials and Tools
Essential Materials Checklist
A well-planned list of materials is crucial for your outdoor fireplace project. Here’s a comprehensive breakdown of what you’ll need:
Primary Building Materials
- Bricks: 200-300 standard bricks
- Face bricks for exterior (weather-resistant)
- Calculate an extra 10% for potential breakage
- Choose color and texture that complement your home
- Mortar: 1-2 bags (60-80 lbs each)
- Type-S mortar recommended for outdoor use
- Weather-resistant properties
- Add an extra bag for unexpected needs
- Firebricks: 50-75 pieces
- Heat-resistant up to 2,000°F
- Use for firebox lining
- Typically lighter in color than standard bricks
Ventilation Components
- Chimney Cap:
- Stainless steel recommended
- Must match flue dimensions
- Rain and debris protection
- Flue Liner:
- Clay or stainless steel options
- Minimum 8×8 inches for proper draft
- Length depends on chimney height
Professional Tool Requirements
Essential Hand Tools
- Shovel
- Square point for foundation digging
- Long-handled for better leverage
- Steel construction recommended
- Level
- 4-foot level for long spans
- Torpedo level for tight spaces
- Laser level for ultimate precision
- Trowel Set
- Pointing trowel (for joints)
- Brick trowel (10-inch recommended)
- Margin trowel for detailed work
Specialized Equipment
- Brick Saw or Wet Saw
- For precise brick cutting
- Diamond blade recommended
- Safety guards required
- Mixing Equipment
- Large mixing tub
- Power mixer attachment
- Wheelbarrow for transport
Pro Tip: Always purchase materials from established suppliers who can provide proper documentation and warranties. Consider renting expensive
Budget Considerations for Your Outdoor Fireplace Project
Before breaking ground on your outdoor fireplace project, it’s essential to develop a comprehensive budget. Here’s what you need to consider:
Material Costs ($500 – $1,500)
- Concrete and Masonry: $200-400
- Foundation concrete
- Concrete blocks
- Mortar mix
- Firebricks: $150-300
- Heat-resistant bricks for firebox
- Refractory mortar
- Chimney Components: $100-400
- Chimney blocks
- Chimney cap
- Flue liner
- Finishing Materials: $50-400
- Stone veneer or brick-facing
- Decorative elements
- Sealer and grout
Tool Requirements ($100 – $300)
- Essential Tools:
- Trowels and levels ($20-40)
- Wheelbarrow ($50-100)
- Safety equipment ($30-50)
- Mixing tools ($20-40)
- Optional Tools:
- Wet saw for cutting brick ($80-150)
- Power mixer ($100-200)
Additional Cost Considerations
- Permit Fees: $50-200 depending on your location
- Site Preparation: $100-300
- Ground leveling
- Base material
- Professional Consultations: $100-200 if needed
- Emergency Fund: Set aside 15-20% of your total budget
Pro Tip: Request quotes from multiple suppliers and watch for seasonal sales on materials. Many home improvement stores offer significant discounts during off-peak seasons.
Hidden Costs to Anticipate
- Delivery fees for materials
- Tool rental if needed
- Site cleanup and disposal
- Landscaping repairs around the construction area
Step-by-Step Construction Guide
Foundation Preparation
To lay a solid foundation for your outdoor fireplace, follow these detailed steps:
1. Mark the Area
- Outline the Space: Use stakes and string to create a clear outline of the fireplace’s footprint. This visual representation helps you understand the size and shape.
- Check Surroundings: Ensure there are no overhead obstructions like branches or power lines that could interfere with construction.
2. Dig
- Excavate the Area:
- Aim for a depth of 6-12 inches, depending on your local climate and soil type.
- Use a shovel or a post-hole digger for more precision.
- Ensure Good Drainage:
- Remove any grass or topsoil, as these can retain moisture.
- Consider sloping the base slightly away from the fireplace to facilitate water runoff.
3. Level the Ground
- Use a Level:
- After excavating, place a carpenter’s level across different points of the area to check for evenness.
- If necessary, add or remove soil until the ground is perfectly flat.
- Compact the Soil:
- Use a tamper or plate compactor to compress the soil, preventing future settling that can lead to an uneven structure.
Building the Fireplace Structure
Creating a solid foundation and proper structure is critical for your outdoor fireplace’s safety and longevity. Here’s a detailed walkthrough of the construction process:
1. Laying the First Row of Bricks
Start with these essential preparation steps:
- Create a dry layout first to visualize the final placement
- Use string lines to ensure perfect alignment
- Space bricks approximately 3/8 inch apart for mortar joints
- Check corners with a mason’s square for 90-degree angles
- Verify the level on all sides using a 4-foot level
2. Applying Mortar and Setting Bricks
Follow these technical specifications for proper mortar application:
- Mix mortar to a peanut butter-like consistency
- Apply a 1-inch thick mortar bed using a trowel
- Butter the ends of each brick with mortar
- Press bricks firmly into place with a slight twisting motion
- Remove excess mortar immediately with your trowel
- Check the level after setting each brick
Pro Tip: Keep a bucket of water and sponge nearby to clean any mortar drips before they harden.
3. Building Upward
When constructing the walls:
- Stagger joints between rows (create a running bond)
- Maintain plumb (vertical alignment) using a level
- Leave appropriate spacing for:
- Firebox opening (typically 36″ x 30″)
- Chimney flue (sized according to firebox)
- Air vents (if required by local code)
- Check alignment every 3-4 rows using a straight edge
4. Visual References
For maximum clarity:
- Take photos of each completed layer
- Mark key measurements on your plans
- Document any modifications from the original design
- Use reference points to maintain symmetry
- Keep detailed notes of mortar mixing ratios
Remember: Always consult your local building codes before and during construction to ensure compliance with safety regulations.
Finishing Touches
Transform your outdoor fireplace from functional to fantastic with these essential finishing elements:
Protective Elements
Chimney Cap Installation
- Choose a high-quality stainless steel cap for durability
- Install 2-3 inches above the chimney crown
- Helps prevent:
- Water damage from rainfall
- Debris accumulation
- Animal nesting
- Spark emission
Safety Features
Hearth Construction
- Extend at least 18 inches beyond the firebox
- Recommended materials:
- Natural stone (granite, slate, limestone)
- Fire-rated brick
- Concrete pavers
- Ensure proper slope for water drainage
- Consider non-slip textures for wet conditions
Aesthetic Enhancements
Landscaping Integration
- Create layers with various plant heights:
- Tall ornamental grasses for the backdrop
- Medium-sized flowering shrubs
- Low-growing ground cover
- Select heat-resistant plants:
- Lavender
- Sage
- Ornamental grasses
- Add lighting features:
- Path lights
- Uplighting on surrounding plants
- Solar-powered accent lights
Decorative Elements
- Install built-in wood storage
- Add weather-resistant seating nearby
- Consider incorporating:
- Decorative screens
- Custom ironwork
- Stone veneer accents
Pro Tip: Always maintain a 3-foot clearance between your fireplace and any combustible landscaping materials for optimal safety.
Safety and Maintenance
Fire Safety Precautions for Your Outdoor Fireplace
Safety should be your top priority when operating your outdoor fireplace. Here are essential precautions to protect your property and loved ones:
Essential Safety Measures
Proper Ventilation
- Install a chimney that extends at least 2 feet above nearby structures
- Ensure smoke has a clear path upward without overhead obstacles
- Consider wind patterns in your area when positioning the fireplace
- Tip: Test ventilation by observing smoke patterns on a calm day
Safe Distance Requirements
- Position the fireplace at least 10 feet from any structures
- Maintain a 15-foot clearance from:
- Trees and overhanging branches
- Wooden fences
- Utility lines
- Flammable outdoor furniture
- Create a 3-foot “safety zone” around the fireplace using non-flammable materials
Fire Starting and Maintenance
- Never use these dangerous accelerants:
- Gasoline
- Lighter fluid
- Kerosene
- Paint thinners
- Use proper fire starters:
- Dry kindling
- Natural fire starters
- Seasoned hardwood
- Keep a fire extinguisher rated for wood fires within easy reach
Regulatory Compliance
- Check your local fire codes for:
- Required permits
- Specific clearance requirements
- Seasonal burning restrictions
- Operating hours limitations
Safety Alert: Always monitor weather conditions before lighting your fireplace. Strong winds or extremely dry conditions can create hazardous situations.
Emergency Preparedness
- Install smoke detectors nearby if the fireplace is close to structures
- Keep a garden hose connected and ready
- Store a bucket of sand nearby as an alternative fire suppressant
- Have emergency contact numbers readily available
Regular Maintenance and Care
To ensure your outdoor fireplace remains safe and functional for years to come, implementing a consistent maintenance routine is essential. Here’s what you need to focus on:
Cleaning Protocol
- Remove ash and debris after each use when the fireplace has completely cooled
- Use a metal ash shovel and bucket for safe disposal
- Brush down brick or stone surfaces with a wire brush every 3-4 months
- Clear spider webs and insect nests from the chimney area seasonally
Safety Inspections
- Monthly Structure Check:
- Examine mortar joints for cracking
- Look for loose bricks or stones
- Inspect the chimney cap for damage
- Check the firebox for any deterioration
Seasonal Maintenance
- Spring Cleaning:
- Deep clean all surfaces
- Check for winter damage
- Clear vegetation growth around the base
- Fall Preparation:
- Clean chimney flue
- Test damper operation
- Ensure proper water drainage
Early Warning Signs
Monitor these potential issues:
- Water stains on exterior surfaces
- Efflorescence (white mineral deposits)
- Rust on metal components
- Unusual odors when burning
- Smoke not drawing properly up the chimney
Pro Tip: Keep a maintenance log to track inspections and repairs. This helps identify recurring issues and ensures nothing is overlooked.
Addressing Common Issues in Your Outdoor Fireplace
When maintaining your outdoor fireplace, you’ll likely encounter various operational and structural challenges. Here’s how to identify and resolve the most common issues:
Smoke Problems
Smoke issues can make your outdoor fireplace unusable and uncomfortable. Common causes include:
- Inadequate Chimney Height
- Add chimney extensions to achieve proper draft
- The optimal height should be 2 feet above nearby structures
- Consider installing a chimney cap to improve the draw
- Improper Flue Sizing
- Widen the flue if it’s less than 1/10 of the fireplace opening
- Install a smoke guard to direct flow upward
- Ensure the damper is fully opened during use
Structural Concerns
Minor Cracks
- Apply high-heat mortar for cracks smaller than 1/8 inch
- Clean the area thoroughly before repair
- Allow 24-48 hours curing time before use
Major Structural Issues
- Watch for:
- Cracks wider than 1/4 inch
- Shifting foundation
- Leaning walls
- Contact a professional immediately if you notice these issues
Performance Issues
- Poor Heat Output
- Check for proper air intake
- Ensure firewood is properly seasoned (less than 20% moisture)
- Maintain correct fuel-to-air ratio
- Draft Problems
- Clean chimney regularly
- Check for blockages
- Consider installing a draft inducer for persistent issues
Safety Tip: Always address structural issues promptly to prevent fire hazards and ensure safe operation of your outdoor fireplace.
Conclusion
Building a DIY outdoor fireplace can be a fulfilling project. It involves selecting the right location, designing, gathering materials, and following proper construction and safety guidelines.
Reap the benefits of personalization and cost savings by creating a unique space in your backyard. Don’t hesitate to start your DIY project. Once you finish, share your experiences and photos on social media to inspire others.